How To Use Helix Vaults
How To Use Helix Vaults
This process occurred on the Rinkeby testnet, some asset prices may not be correct.
First steps for using the vaults on Helix is to ensure you have the correct tokens available in your wallet. From launch, only Helix-reward vaults will be available, however, the ability to vault other assets will be enabled on the platform when feasible.
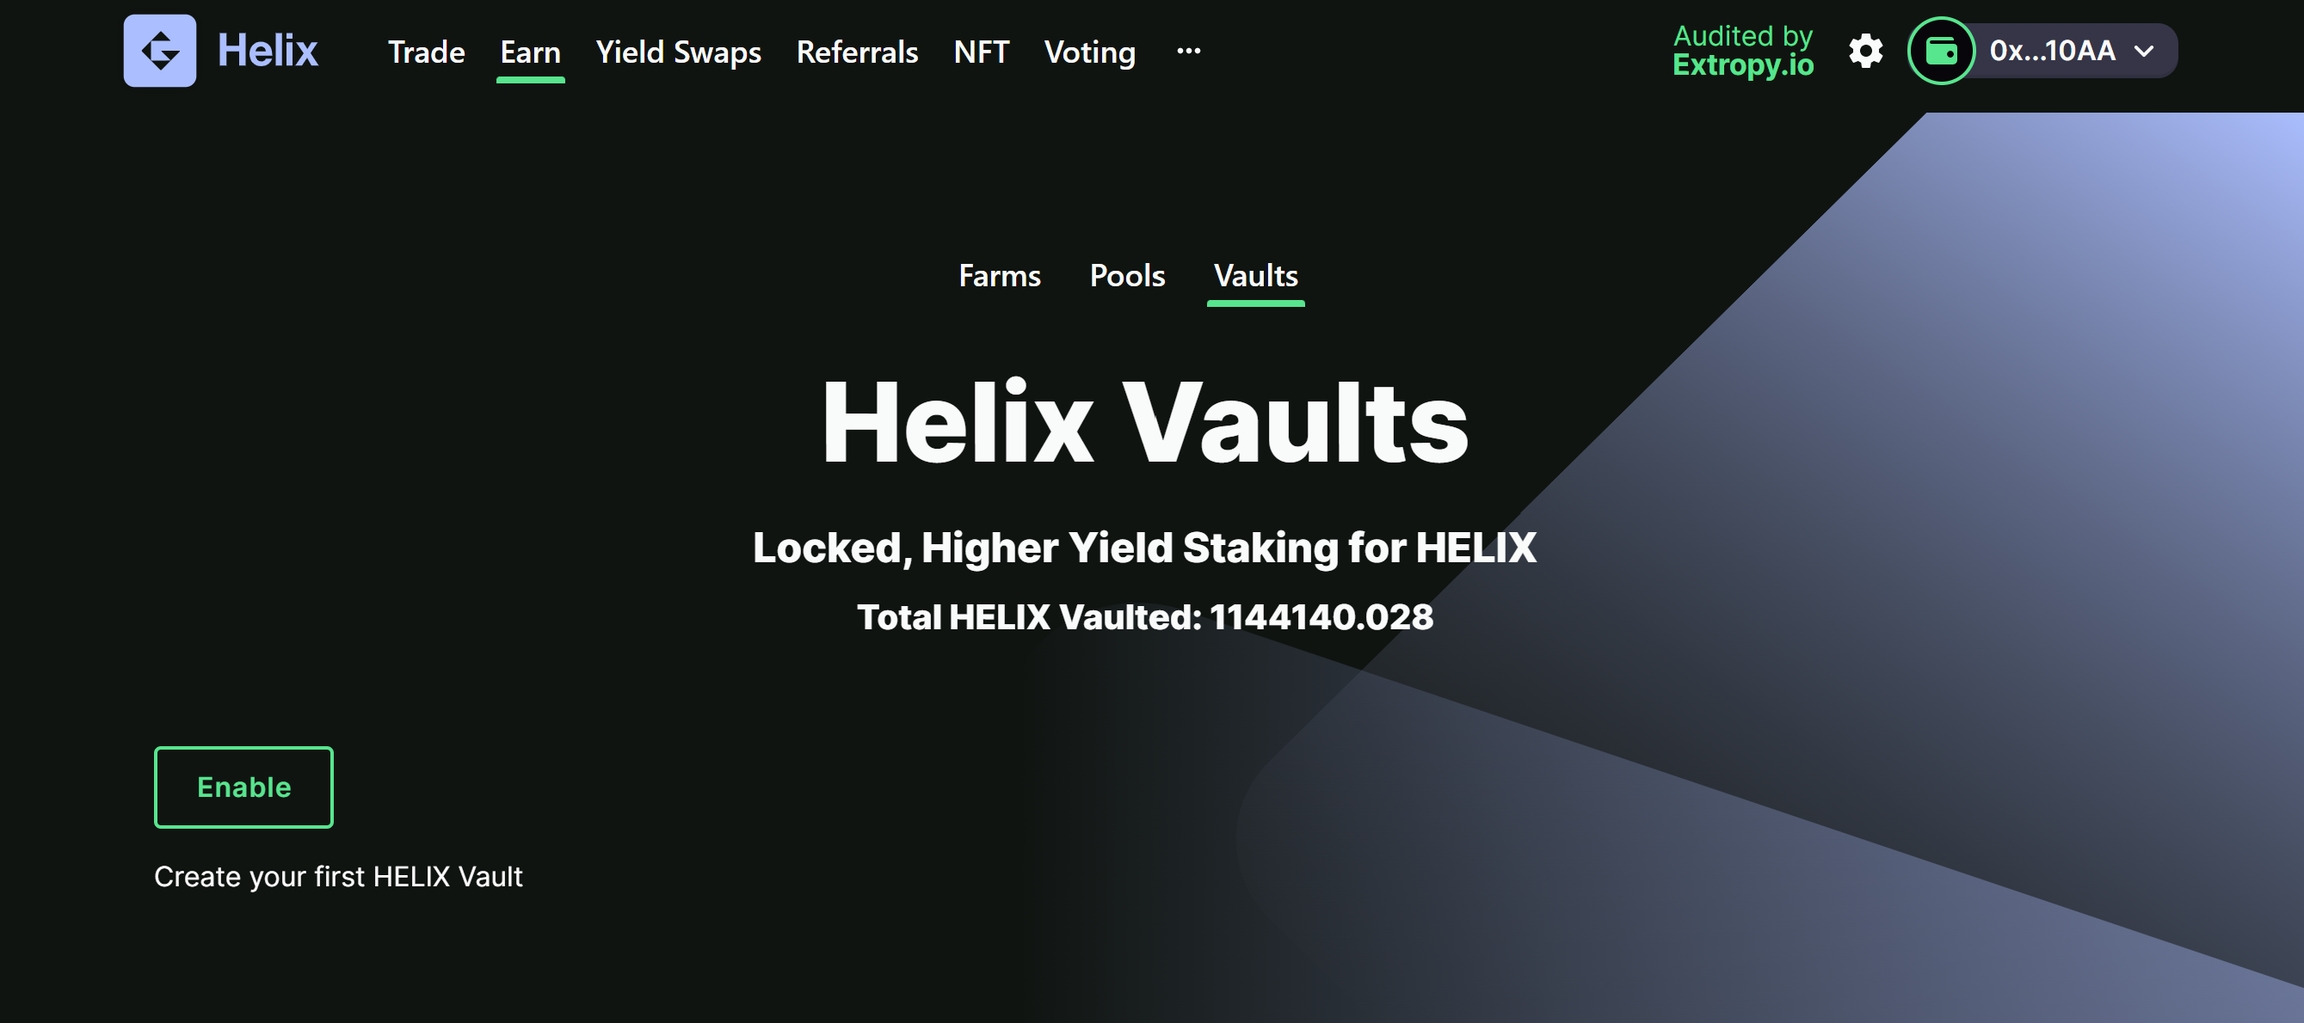
When you have the correct assets, navigate to the earn tab and choose the Vaults.
Select "Enable" to get started, and confirm in your wallet. As usual, ETH is required for gas fees.
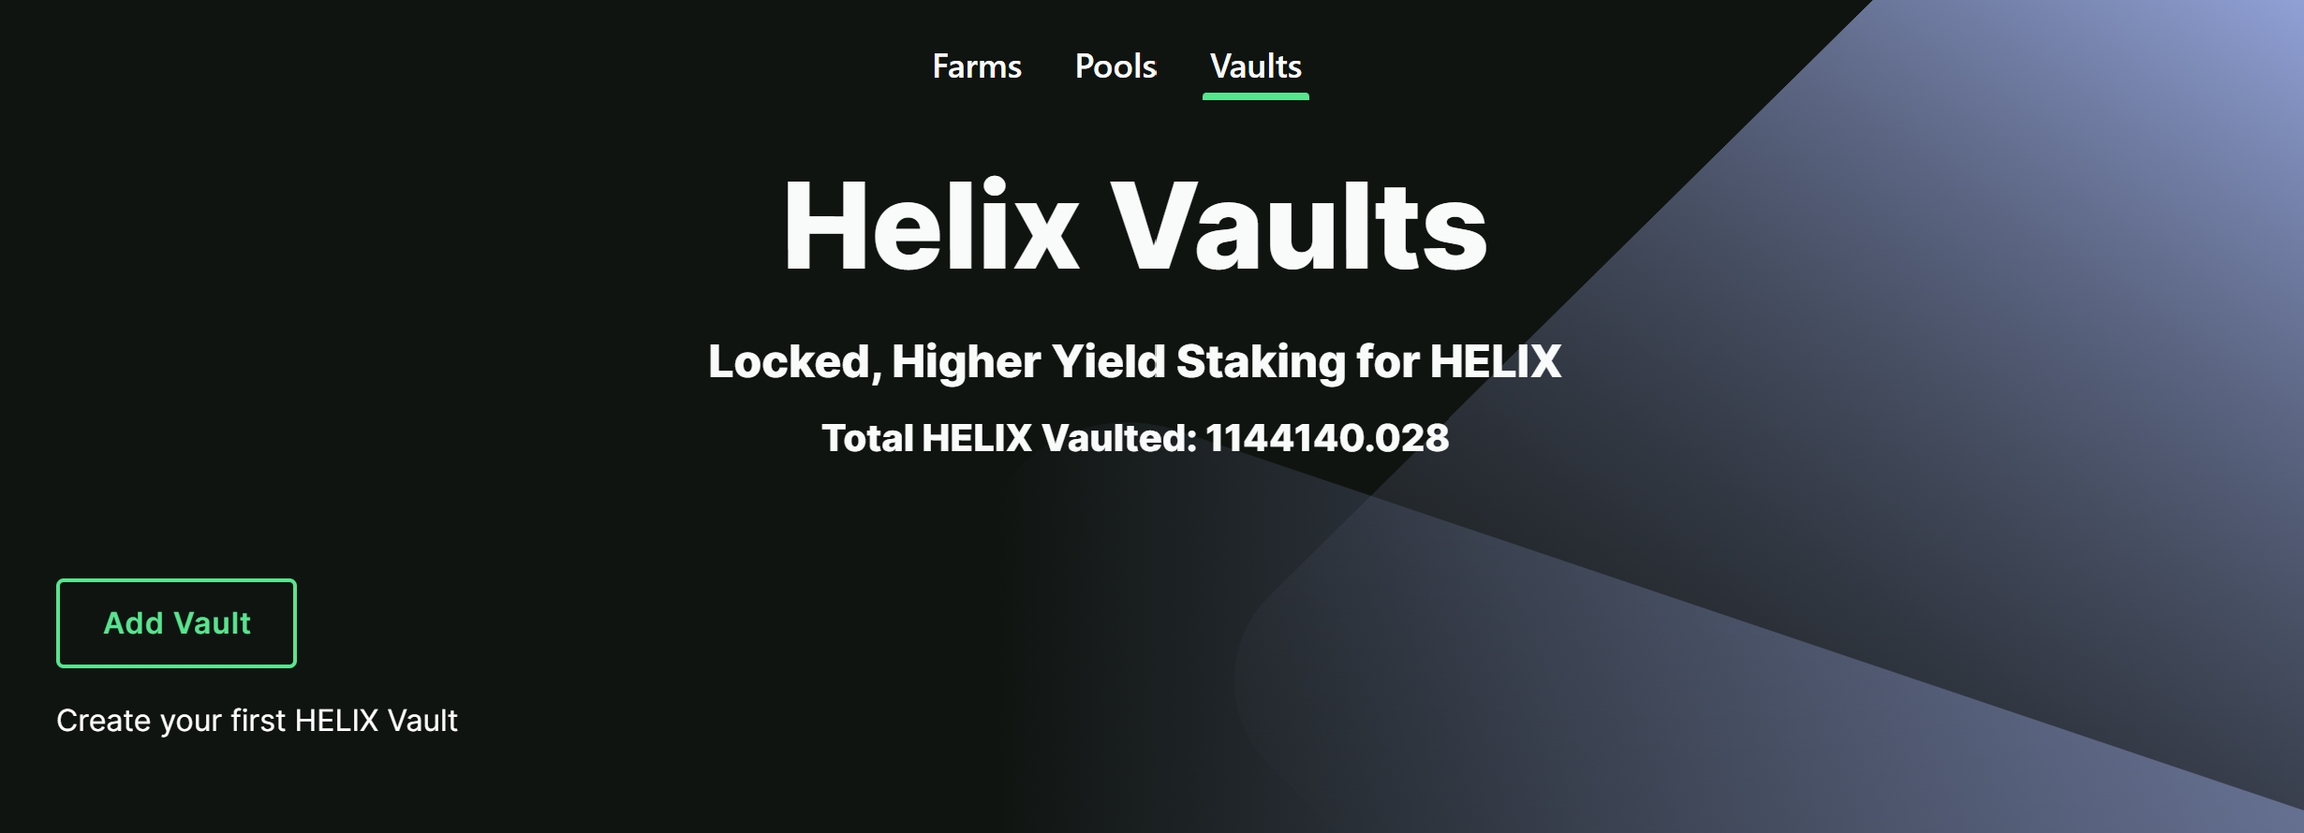
When complete, a new tab will be available allowing you to add a vault, select this to continue with the process.
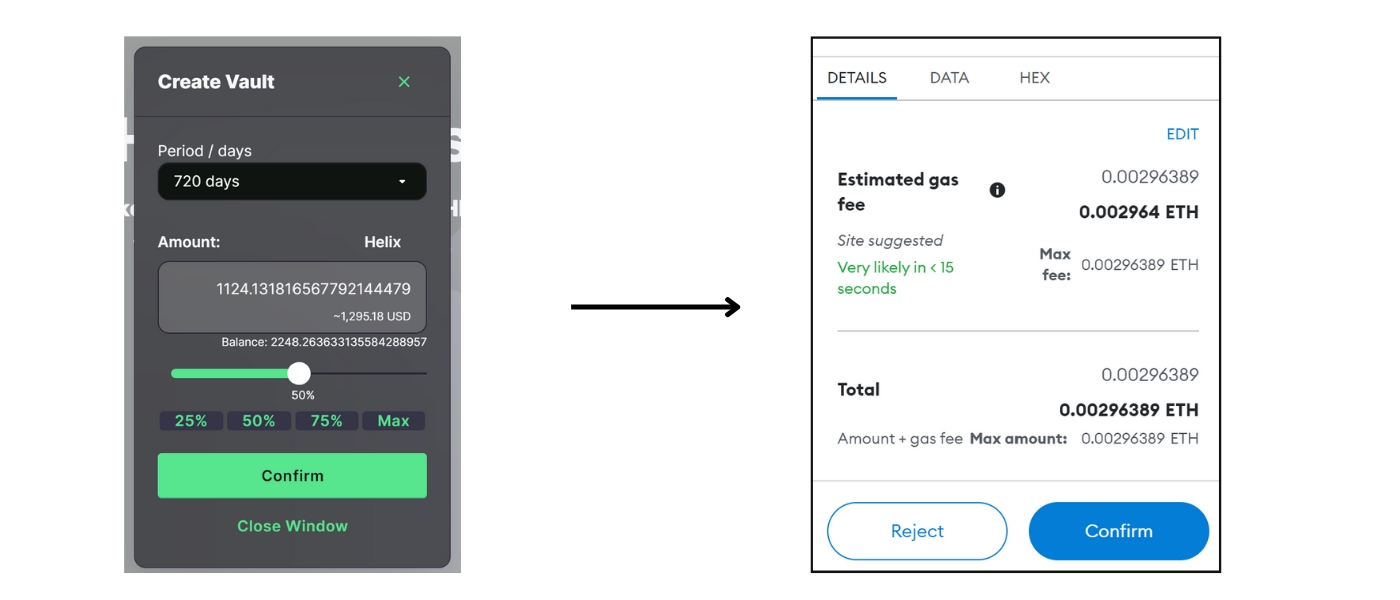
After approving and selecting to add vaults, you are required to select a lockup period (min 90days) and the amount to deposit. Remember, assets deposited into the vaults cannot be retrieved until the lockup period expires.
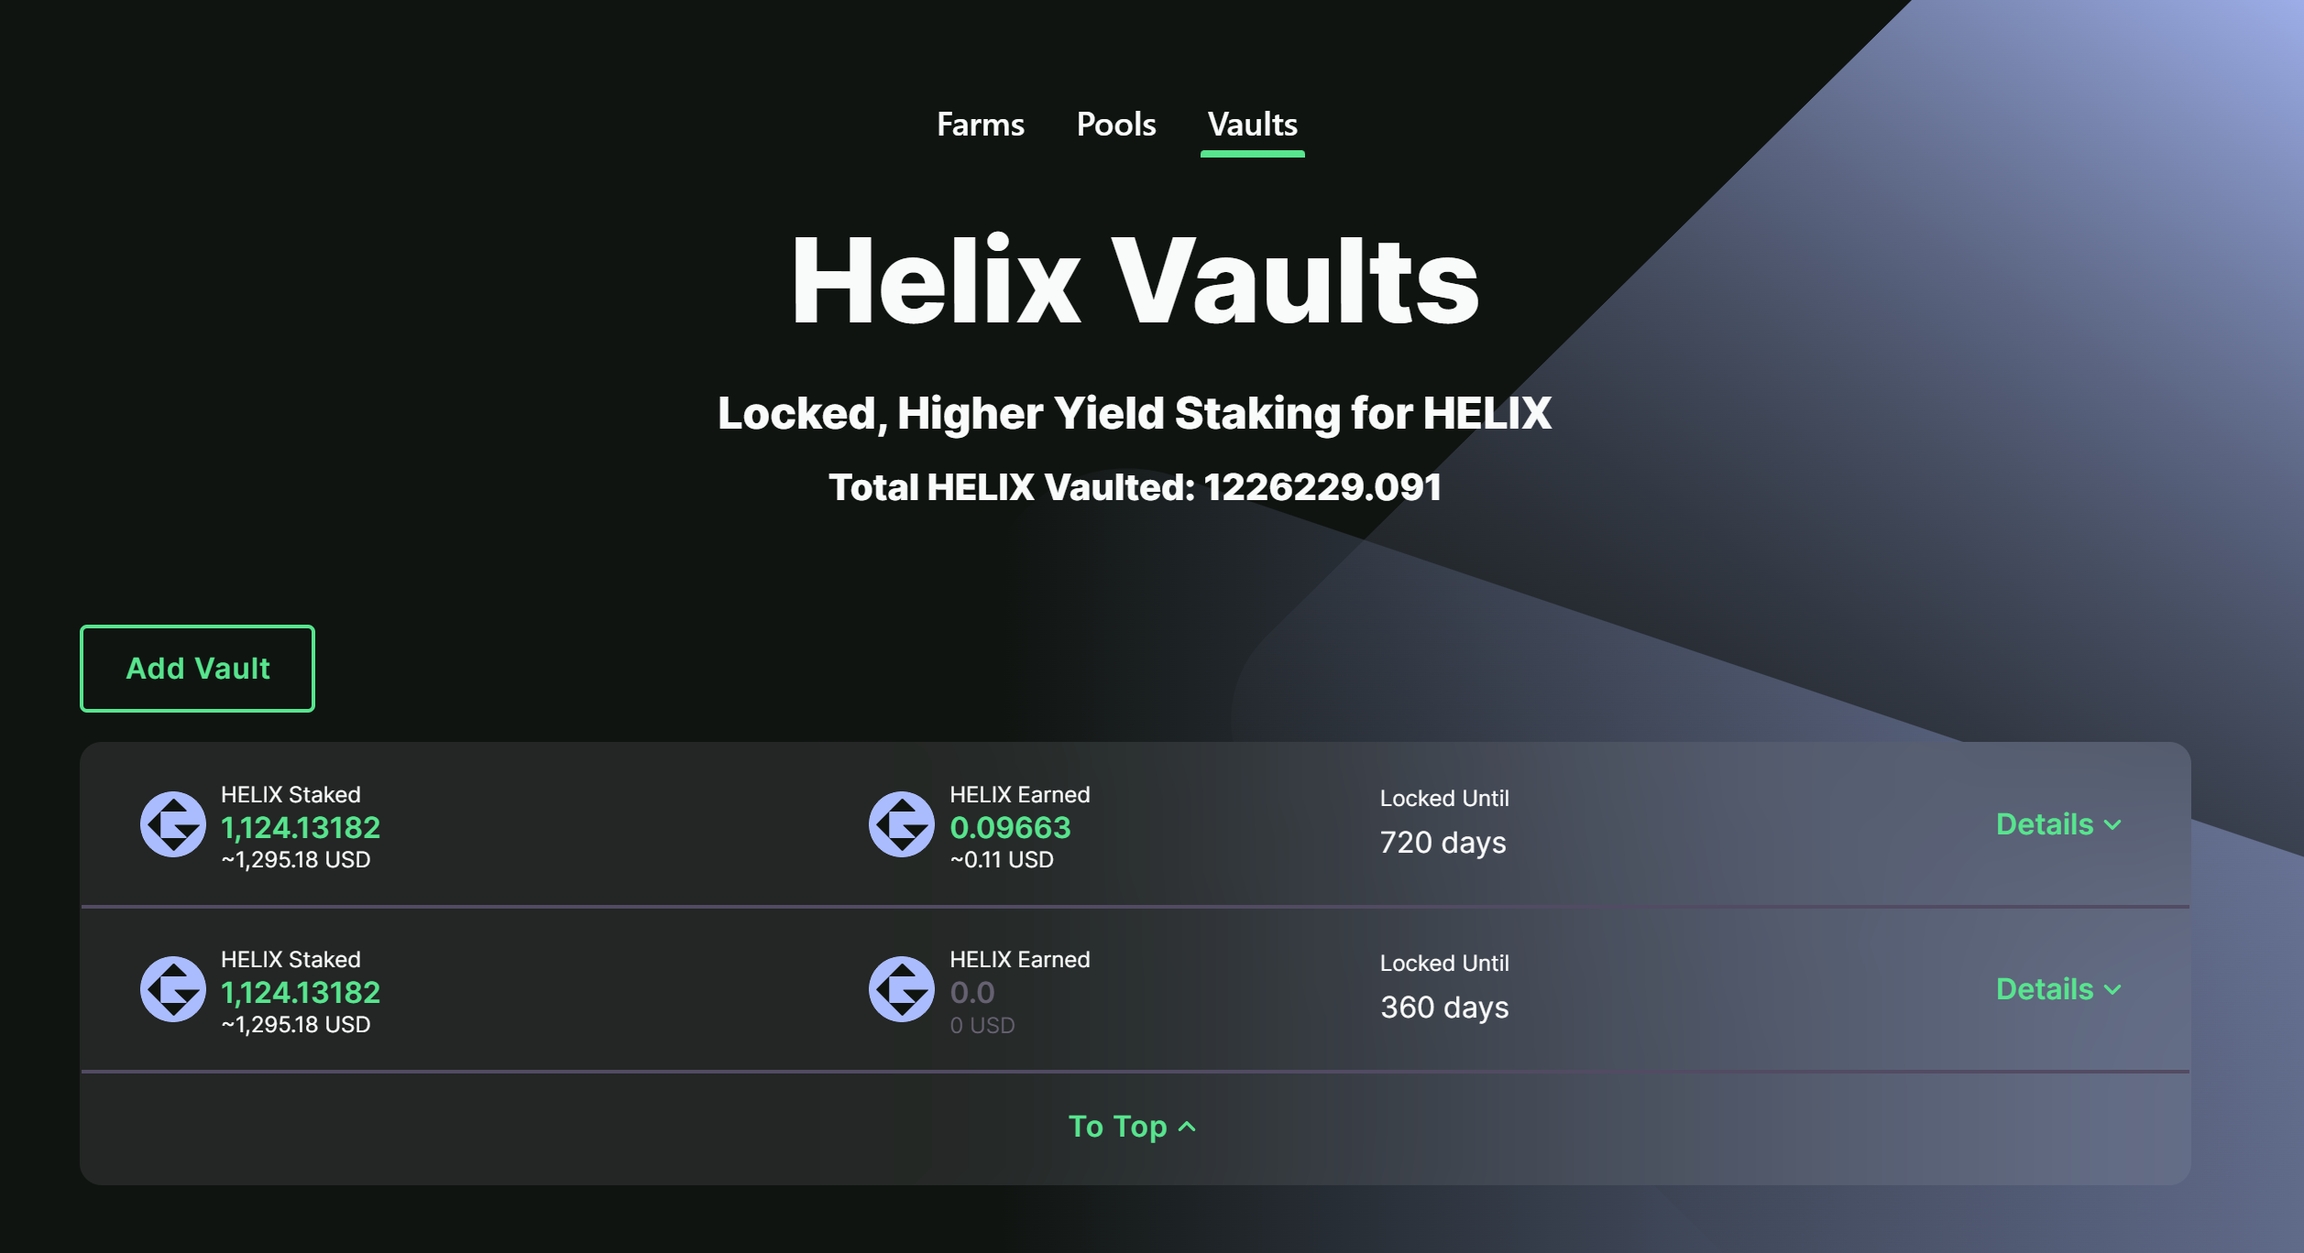
For this example, we have chosen to lockup 50% of our remaining HELIX for a 720 day period, as this offers the highest multiplier.
Confirm the details, and approve the lockup through your wallet popup.
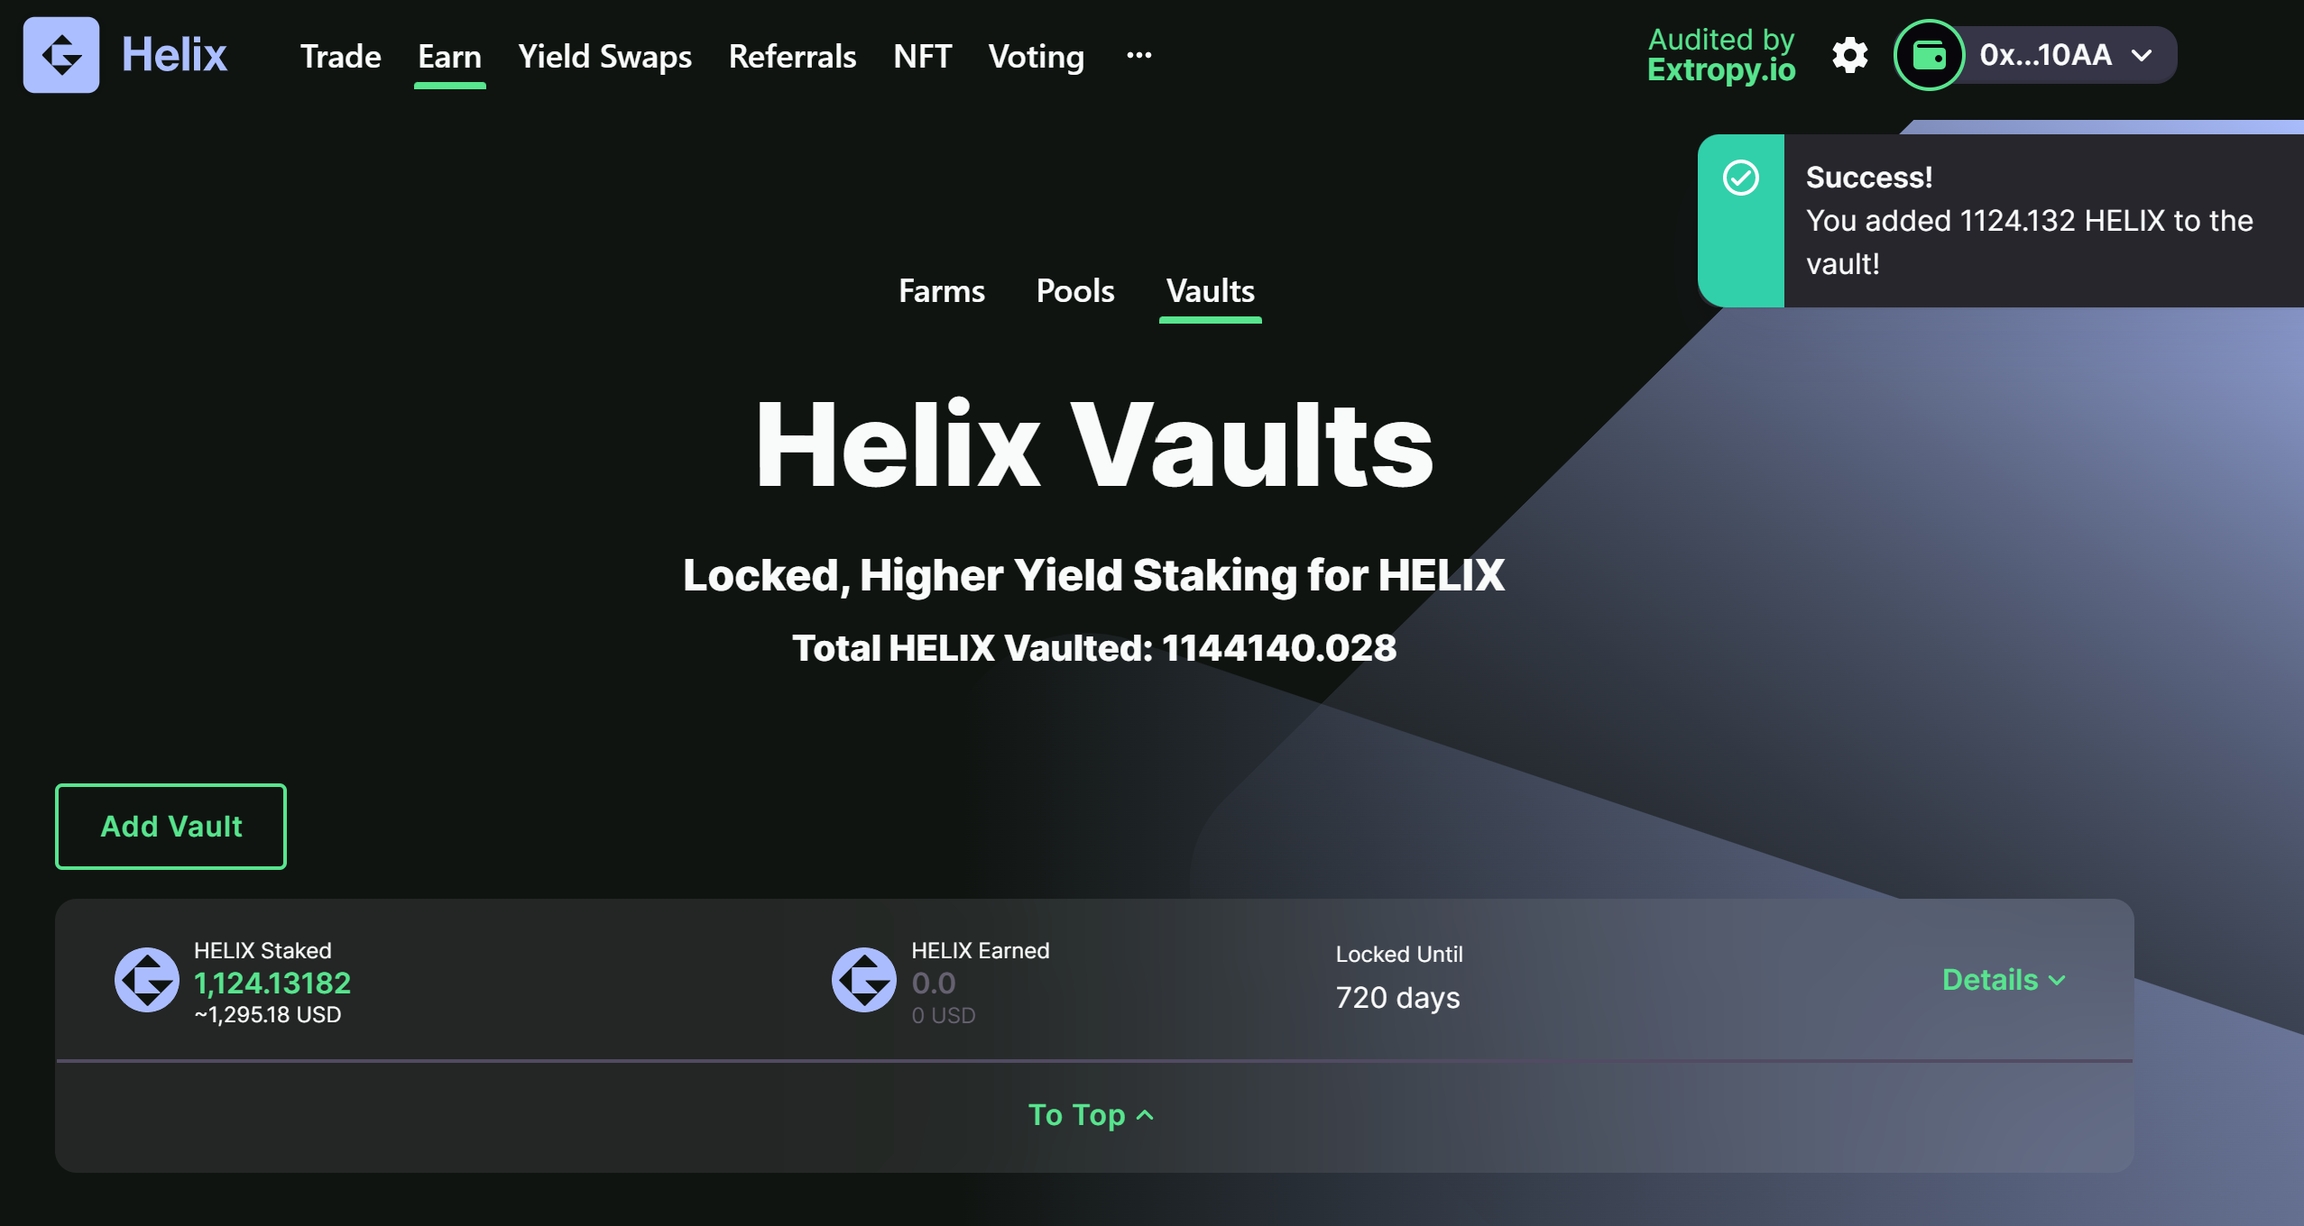
After successful completion of the lockup, your vaulted assets will show on the main page for the Vaults, allowing you to easily see your allocations, and unlock periods.
To add more vaults, with different lockup periods, simply follow the process again and select the different option. When done, this new vault will show alongside the original.
For this second example, we have used the remaining 50% of HELIX, and locked for a period of 360 days. Due to the shorted lockup period of this second vault, it will earn less in the long-term, but is available to access earlier.
Last updated