How To Add/Remove Liquidity
Providing liquidity might sound complicated, but in reality its not much harder than a few clicks of a button and two minutes work, in doing so participants help the protocol obtain additional liquidity, making trading smoother for users, and are rewarded with a share of the trading fees.
In addition to earning trading fees, LP tokens are distributed, which can then be staked on the Helix farms to earn even more yield from the initial liquidity.
Because of the manner in which liquidity pools function, its necessary to deposit an equal amount of two different crypto assets, allowing users to trade against both.
How To Provide Liquidity
This process occurred on the Rinkeby testnet, some asset prices may not be correct.
First steps are ensuring you have a pair of assets to deposit into the relevant pool, if you haven't already, check out the earlier section, "How to trade tokens" , it'll give you a quick run-down on trading for different assets on the platform.
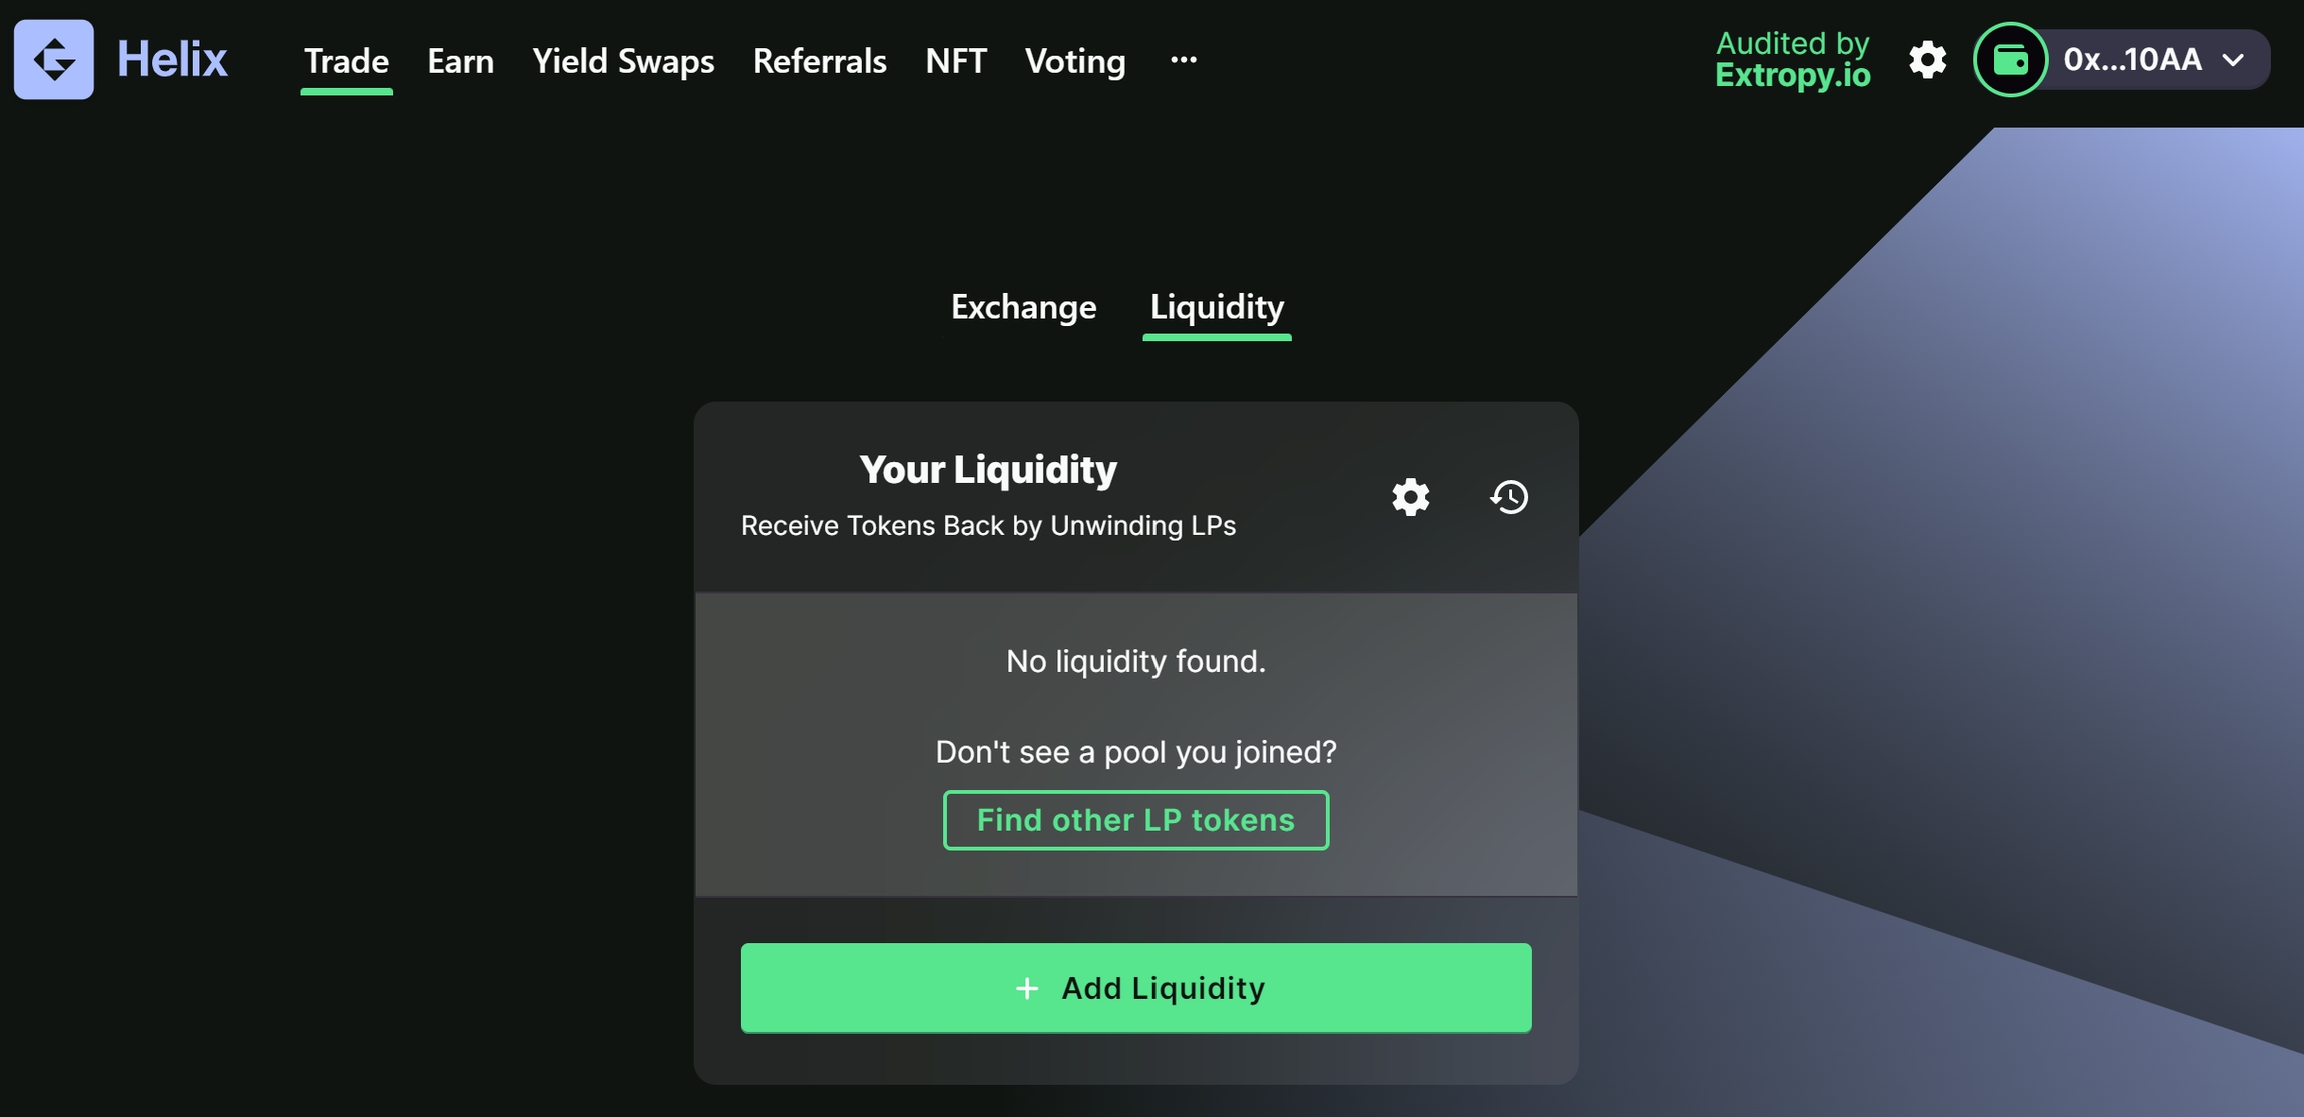
If you already know the pair you want to add liquidity to and hold the assets in your wallet, choose the liquidity tab from the menu and select "add liquidity". If you are unsure, follow along with the next step.
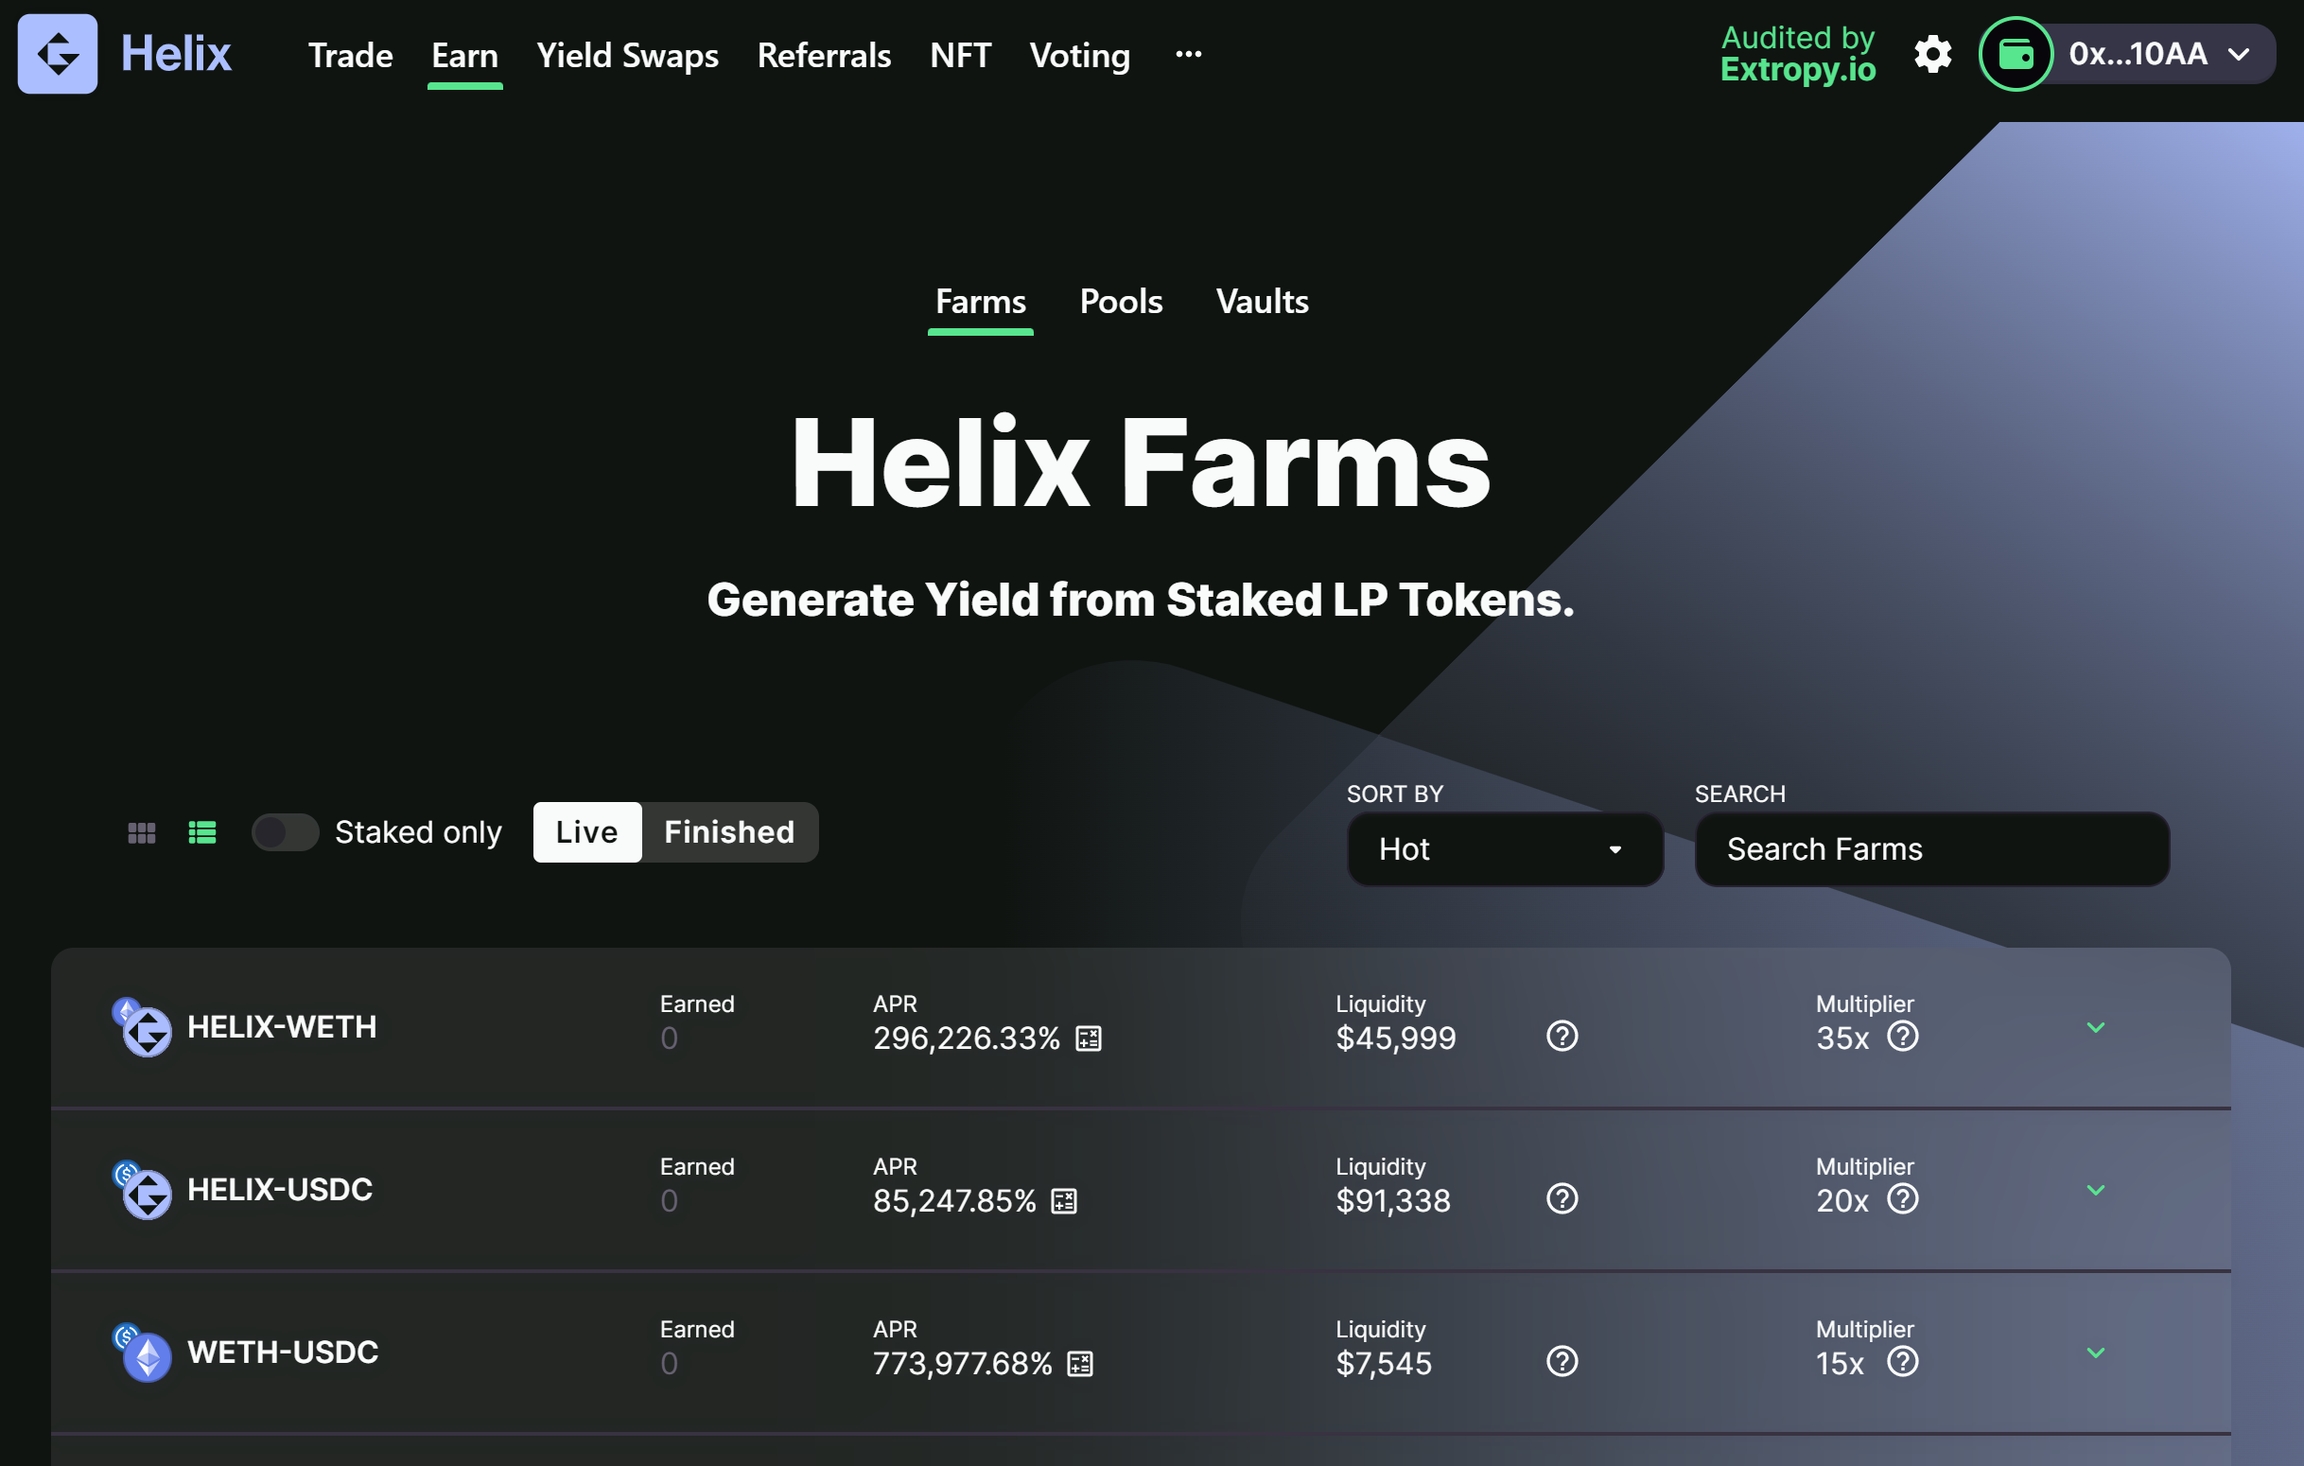
Another way of accessing where to place liquidity is through the earn tab, where you can see high-rewarding farms.
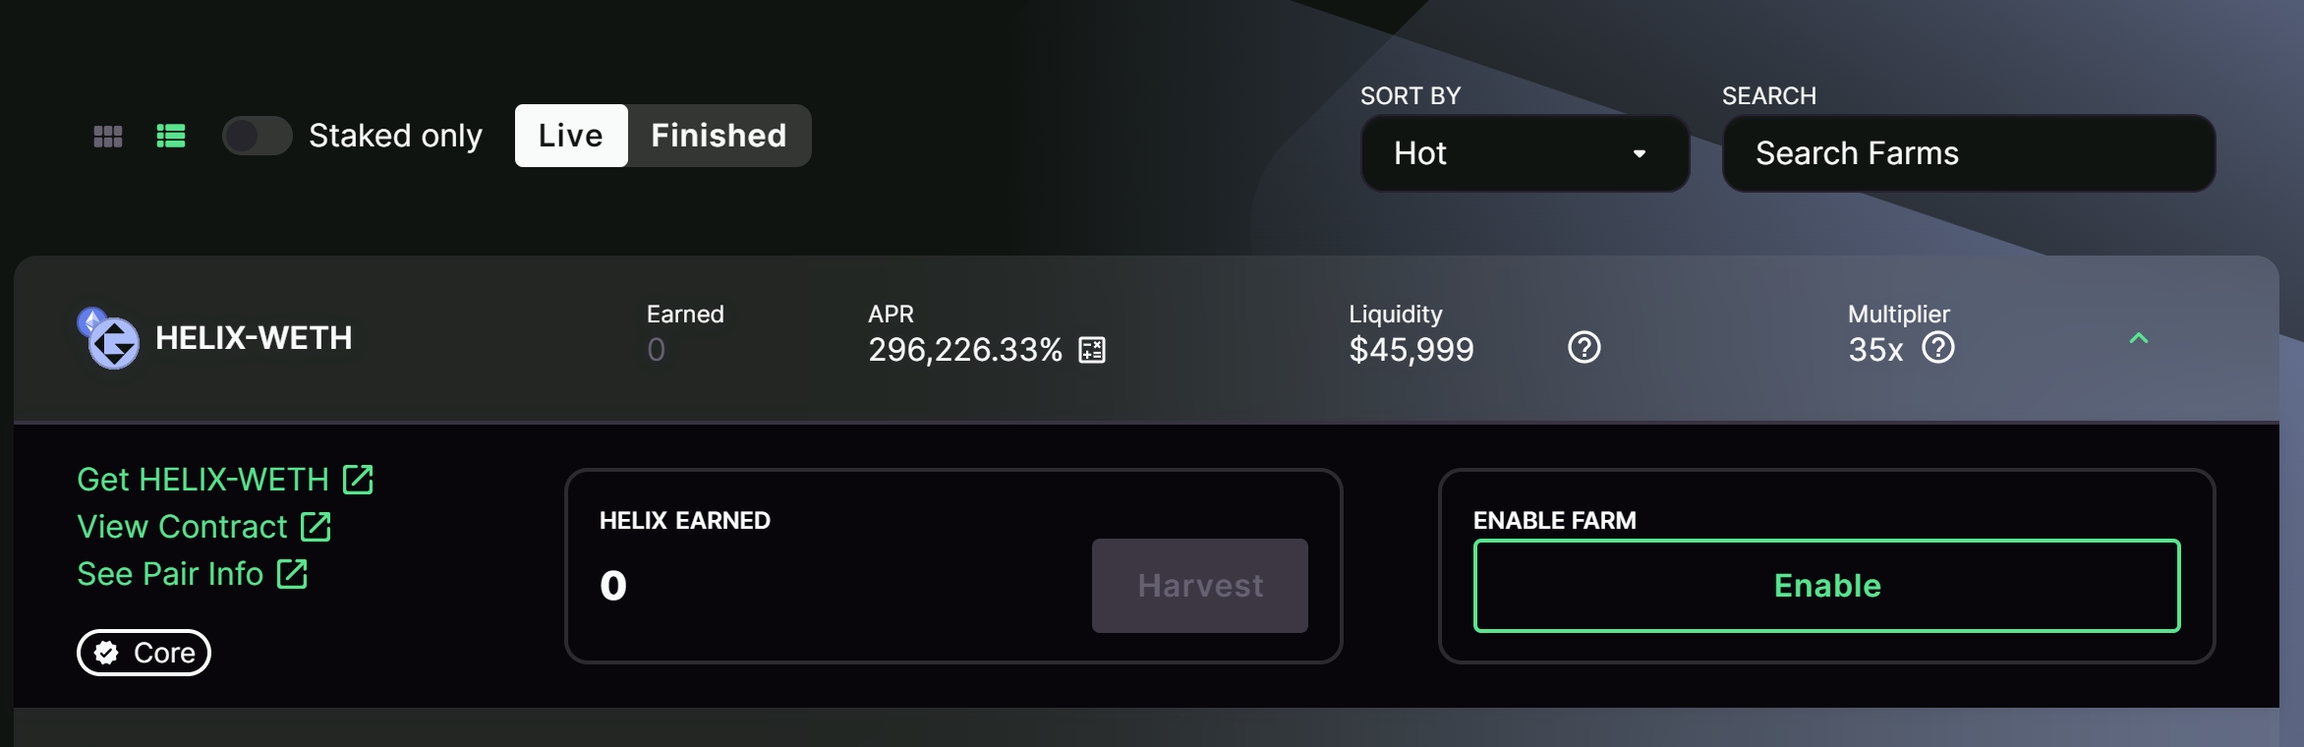
Select the tab of your chosen farm to open the drop-down menu, for this example we will be using ETH and HELIX to provide liquidity, so choose the HELIX-WETH farm (Helix automatically converts ETH to WETH for staking)
Within the drop-down menu there is a direct link to the particular pair needed for each farm. On this example it is labeled, "Get HELIX-WETH".
By selecting this tab you will directed to the add liquidity screen from step 1 of this guide where you can choose the amount of liquidity to provide in this pairing.
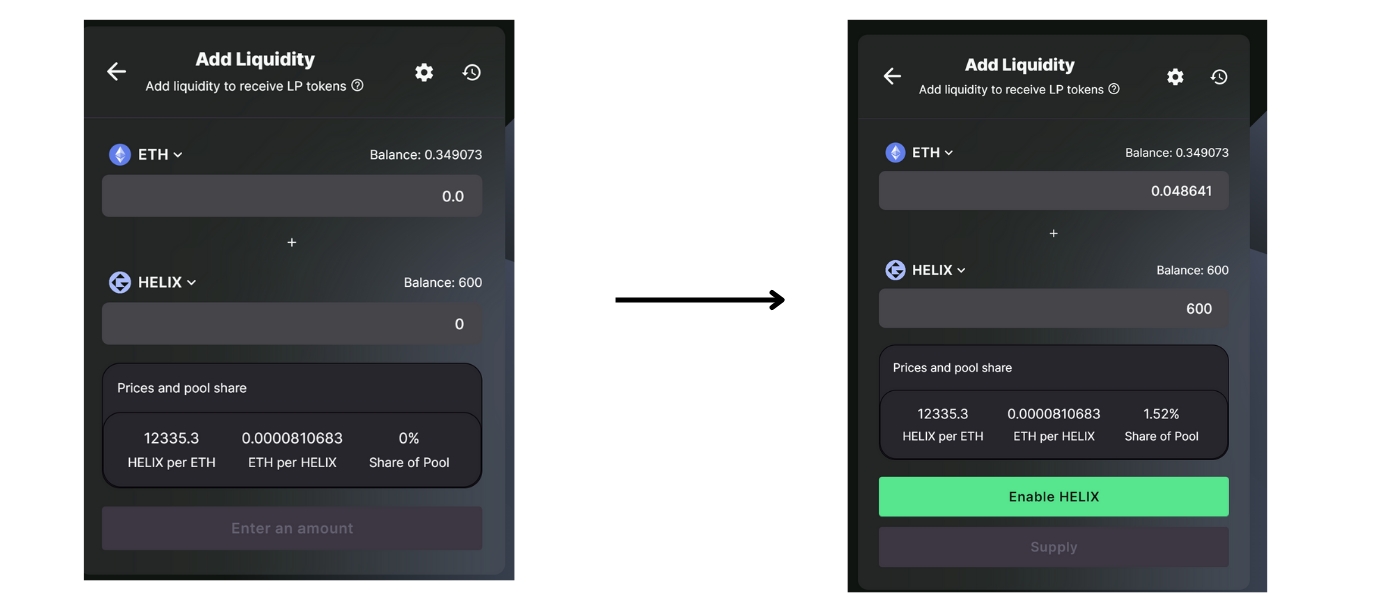
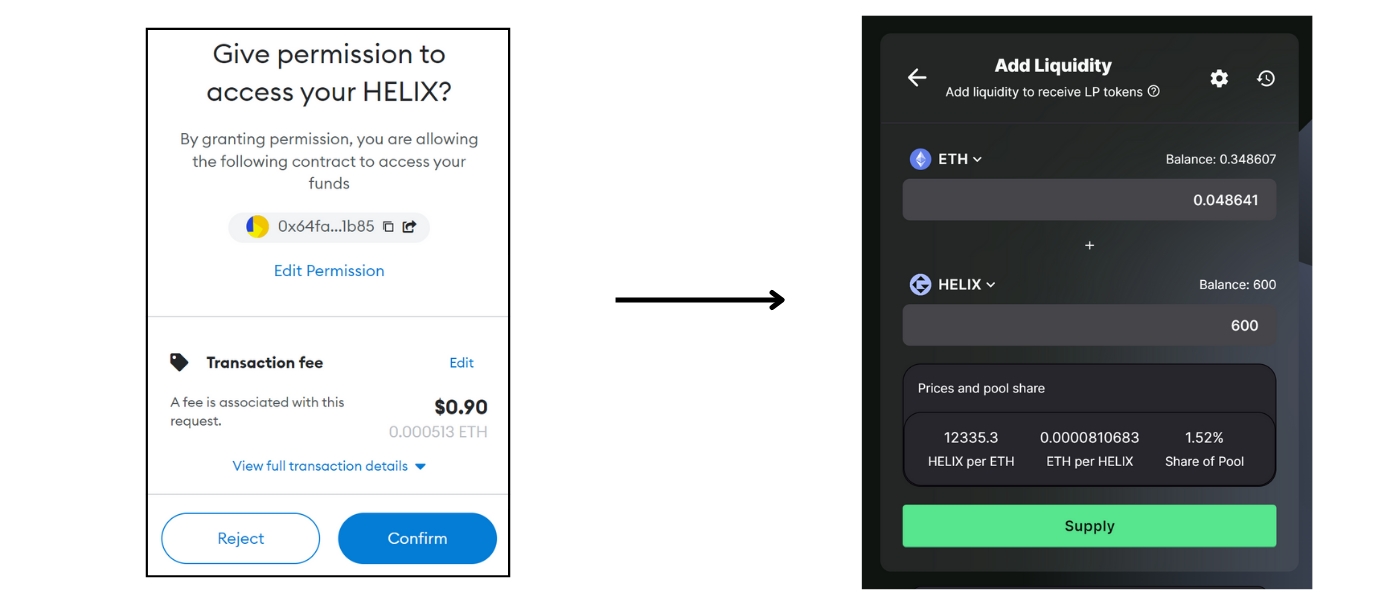
For this example we will be using the 600 HELIX purchased in the earlier "How to trade tokens" guide.
Due to the way liquidity pools on Helix function, assets be provided in pairs. After selecting to add the 600 HELIX tokens, the auto-calculation will show how much ETH is needed to make the pair.
Enable the tokens by hitting the enable tab, and confirm the action in your wallet. There is a small gas fee associated with this approval.
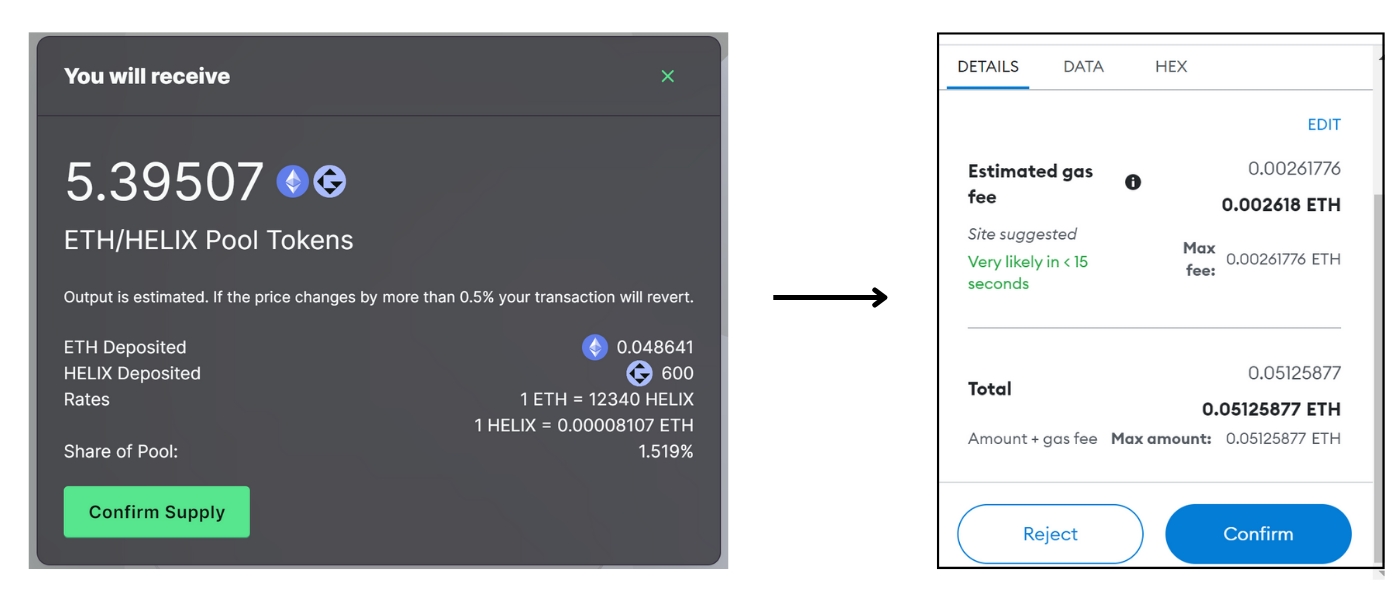
After approving the liquidity the "supply" tab will be accessible, click this and confirm the details on the platform popup, and finally confirm with your wallet.
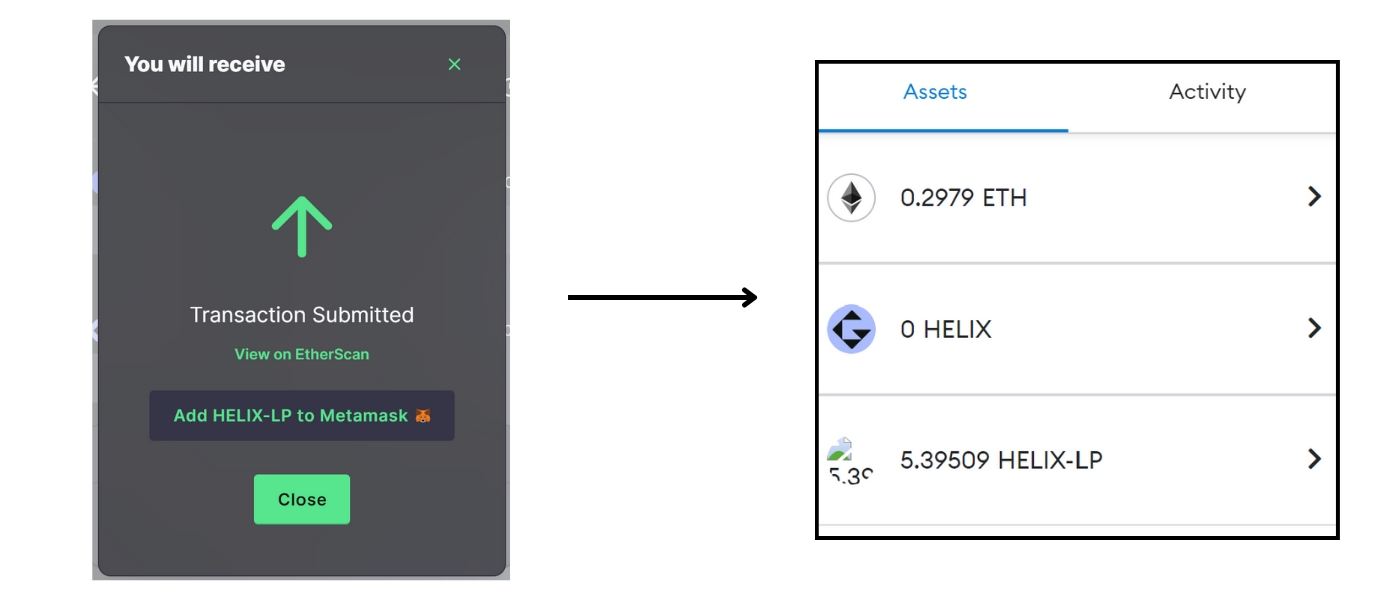
After the transaction has been confirmed your assets will be earning a passive income providing liquidity to Helix, in the meantime LP tokens will have been distributed to your wallet, which can be placed in the corresponding yield farm.
A final popup will allow you to add the LP tokens to your wallet, not essential, but definitely helpful, especially for users providing multiple liquidity positions.
After doing so, the LP tokens will be viewable in your wallet in the same way as any other token.
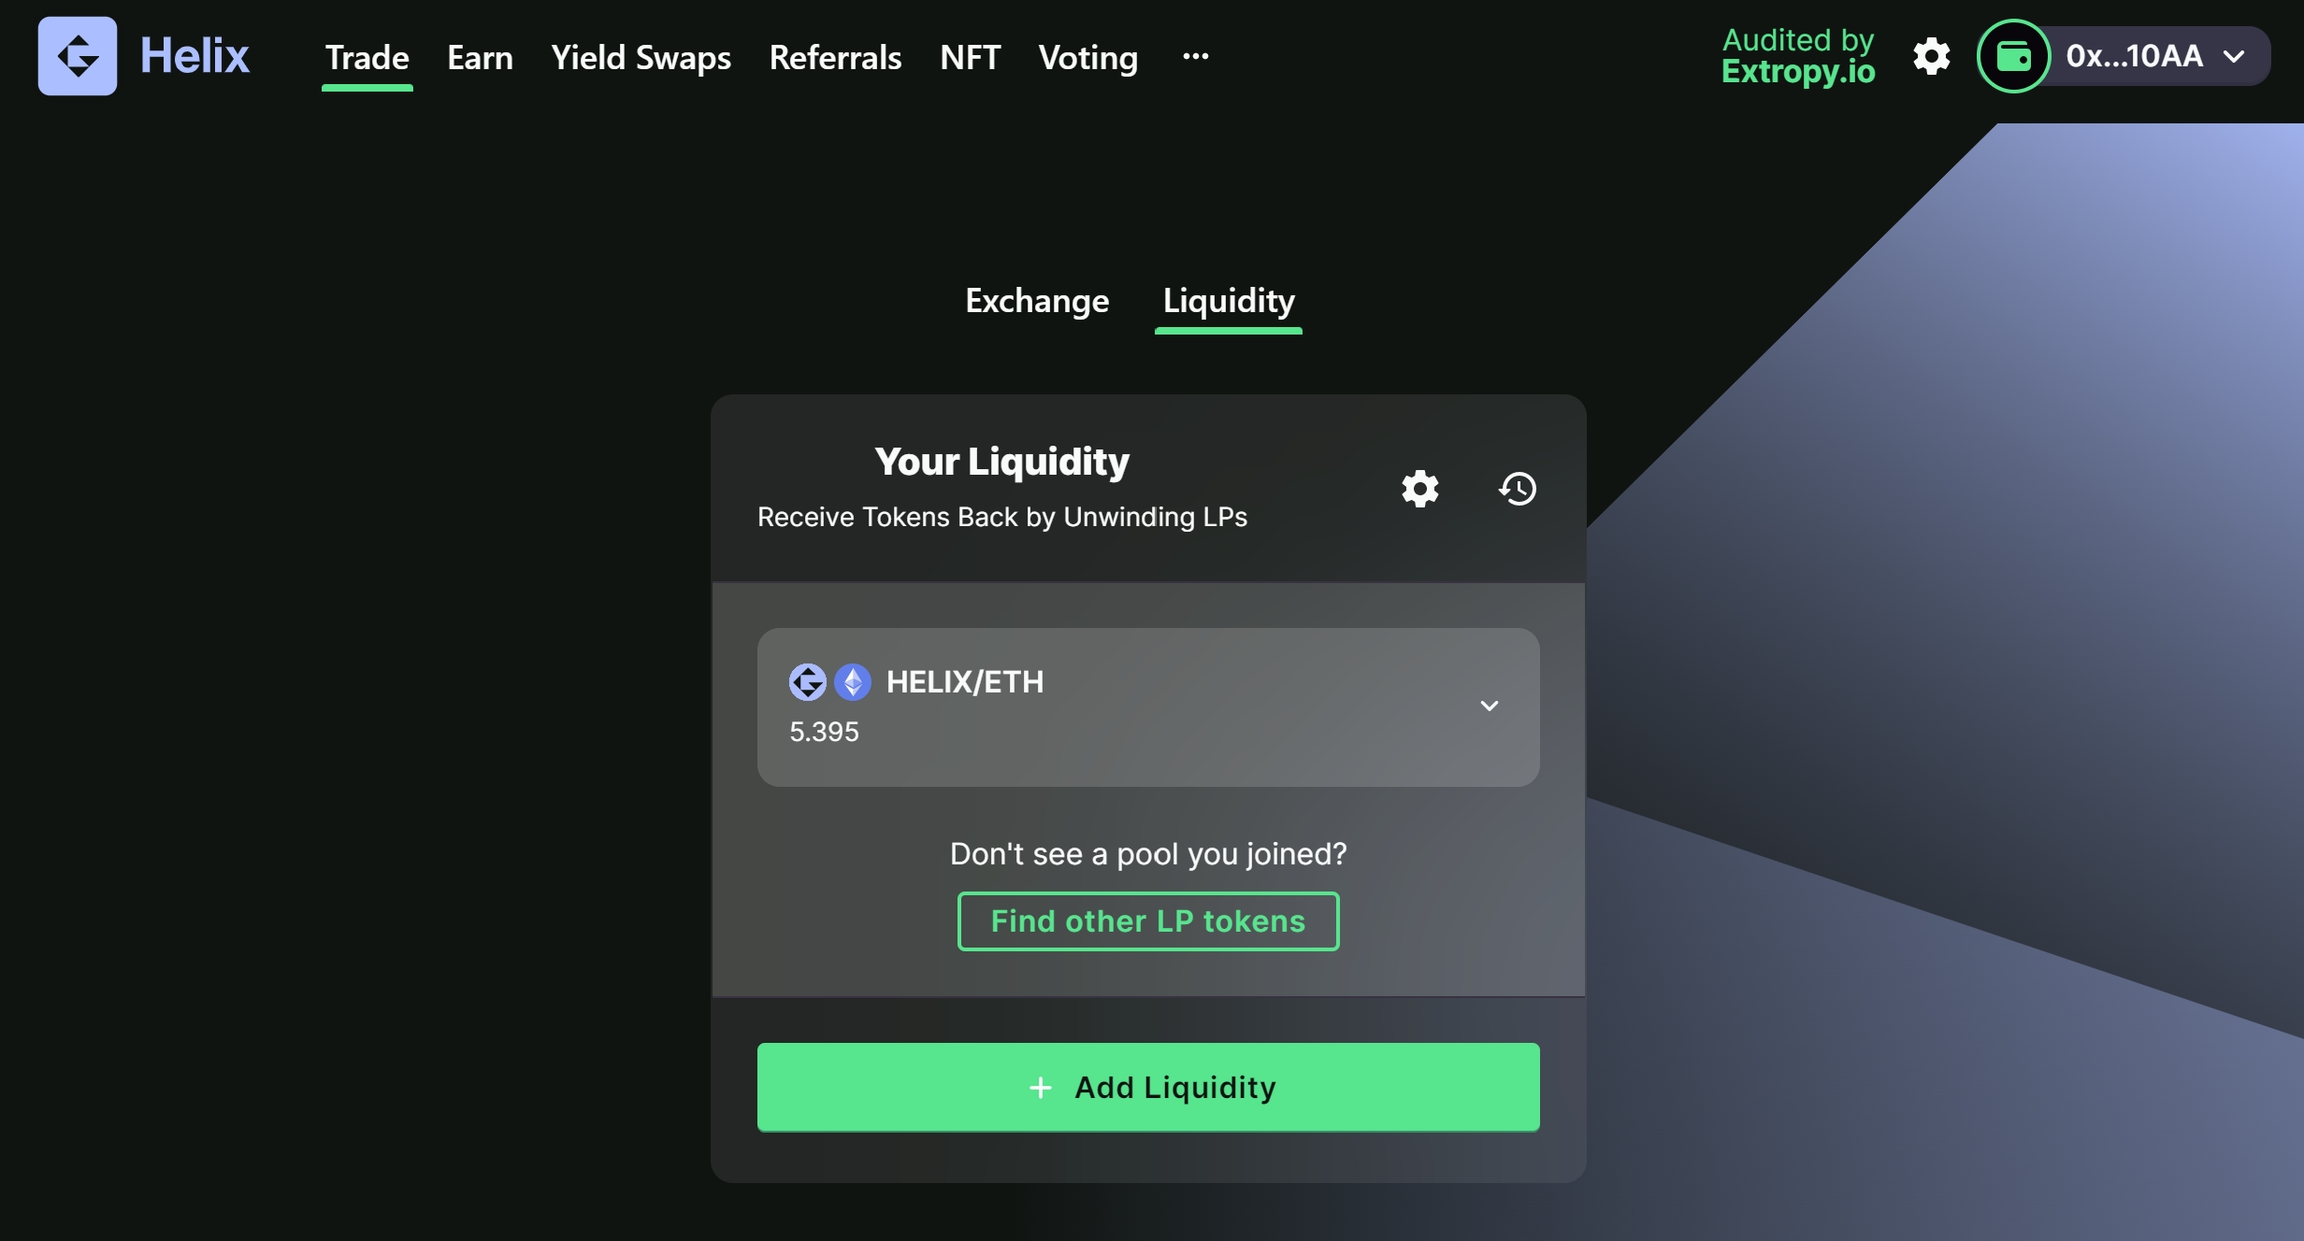
To view your liquidity positions at any time, select the "Trade" tab, and choose "Liquidity".
Now, with the process of adding liquidity complete, LP tokens can be staked in the Helix farms in order to earn maximum yield. We have continued this guide on the "How to use yield farms" section.
How To Remove Liquidity
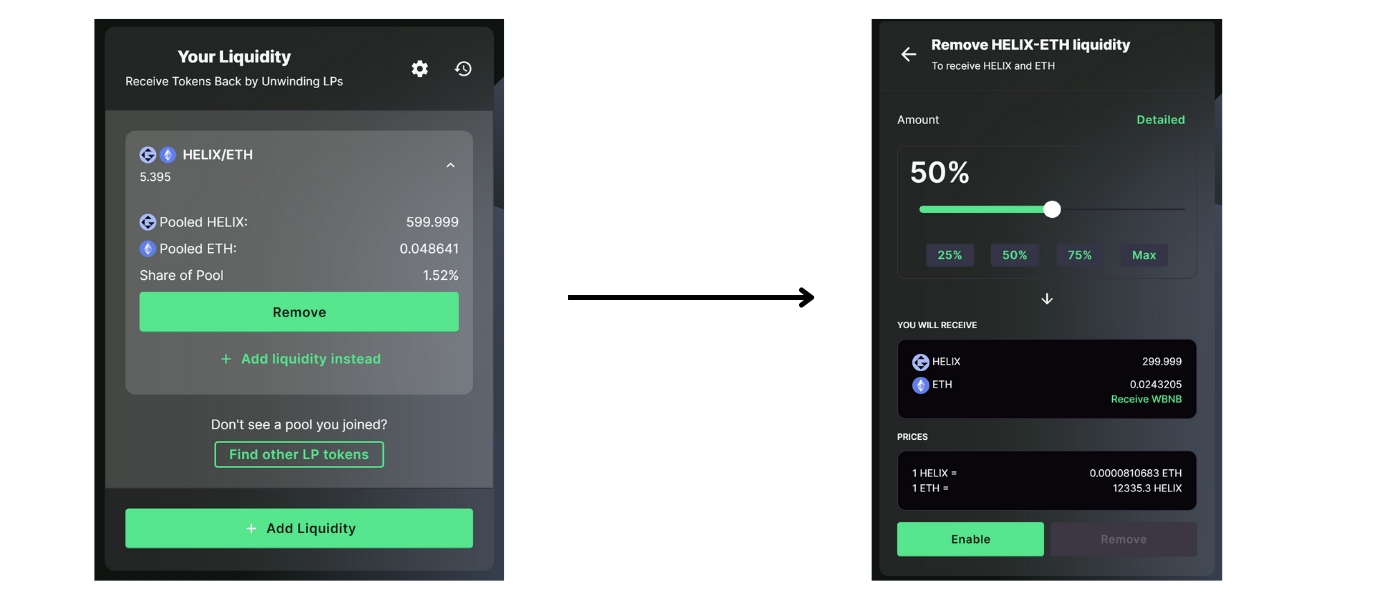
To remove liquidity from one of the pools, visit the liquidity page and find the correct pool under "Your liquidity". Click remove, and choose the amount you would like to redeem, it is not necessary to remove the full amount.
For this example we will remove half of the liquidity position.
Select the "Enable" tab, and confirm the action in your wallet with the "Sign" tab.
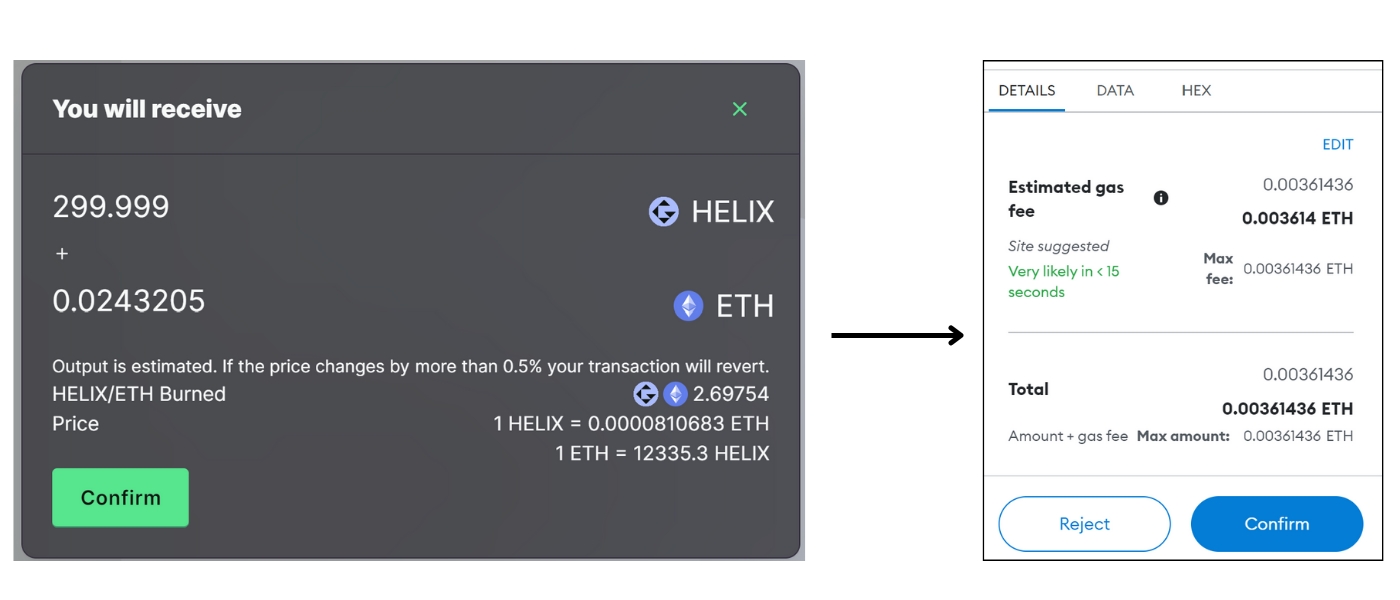
After confirmation, the "Remove" tab will be available, select this and confirm the details on the platform popup, then approve the transaction in your wallet.
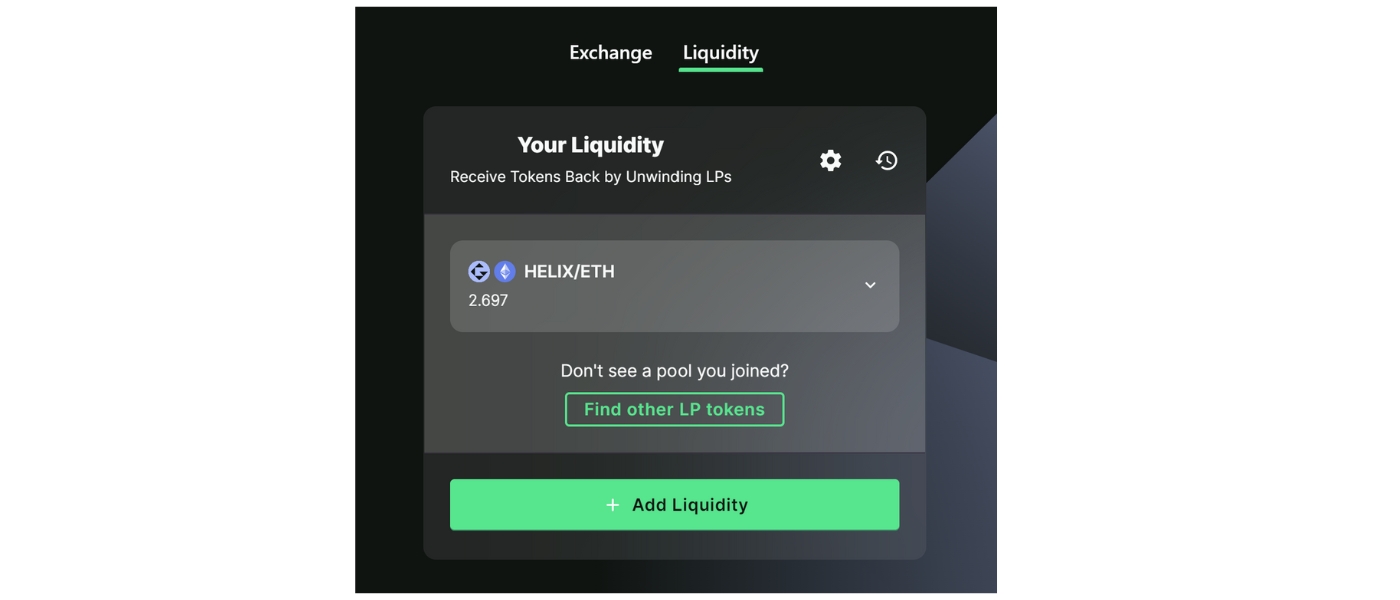
When the transaction is complete both tokens from the pair will be returned to your wallet, including any rewards earned from trading fees.
If you haven't removed the full amount of deposited liquidity, the total will update automatically on "Your liquidity". Additional tokens can also be added to LP positions in the same way.
How To Create A Liquidity Pool
Liquidity pools on Helix are permission-less, meaning anybody can create one for a token at any time. To do so, simply head over to the Liquidity tab on the "Trade" drop-down menu.
Choose "Add Liquidity" to create a pair.
Select the token pair you would like to create a pool for and input the amount of each you will be depositing - when creating a new pairing, the token price is set by the initial liquidity provider. Further information will be displayed regarding pricing and pool share.
After confirming and supplying liquidity, the LP position will show on your liquidity. The new token pair is now tradable and can be bought and sold by other users on the platform.
For user security, we recommend locking liquidity in a time-lock smart contract. (Long-term projects often burn their LP tokens to remove the possibility of being able to remove the liquidity, but a time-lock smart contract essentially does the same job for a certain period of time)
Last updated